How To DJ With Vinyl: A Step-By-Step Guide
May 24, 2023
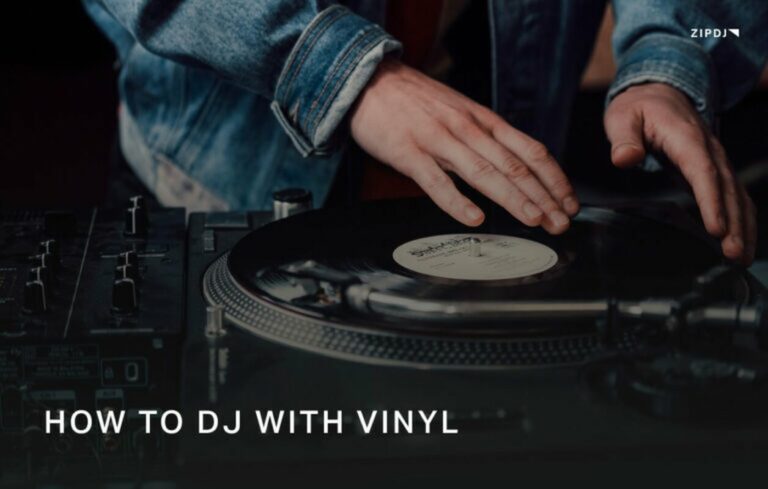
With vinyl records becoming popular again, learning how to DJ with vinyl is something aspiring DJs are doing in greater numbers.
Real records offer a more tactile and hands-on approach to mixing, while buying records opens up access to classic and obscure releases from niche labels.
Find out how to take your vinyl collection to the next level with this step-by-step guide covering everything you need to know to DJ with vinyl.

How To DJ With Vinyl (Step-By-Step)
DJing with vinyl requires different skills and equipment than a laptop or DJ controller and is widely considered its own art form.
While the club industry has largely shifted away from turntable DJing, learning how to mix with records gives DJs an edge over the competition.
To DJ with vinyl, you’ll need the appropriate equipment and a selection of records you know and love to ensure the experience is as fun as possible.
Why Learn To DJ With Vinyl?
There are several advantages to learning how to DJ with vinyl that makes it an attractive option for many DJs today who want to expand their skill set.
Vinyl records have a warmer, fuller sound compared to digital files, with deeper and richer-sounding bass and more forgiving with distortion.
It’s also essential if you want to scratch DJ at the top of your game, with vinyl’s more tactile nature making scratching far more fun and rewarding.
There’s also the enjoyment of crate digging, picking up rare and original music that hasn’t found its way to the mainstream, such as limited-run white-label releases.
Ultimately, becoming a vinyl DJ gives you more options for the content you play in your live sets and the chance to showcase new technical skills to your fans.
Vinyl DJ Setup
It goes without saying that the first and most important equipment you’ll need to DJ with vinyl is a pair of turntables, which you’ll use to play the records.
There are many excellent turntables on the market, from the iconic Technics SL-1200s and scratch-friendly Vestax decks to cheaper alternatives.
You’ll also need the following:
- A pair of high-quality headphones with a closed-back design, which you’ll use to monitor and cue up the next track.
- A DJ mixer, which the turntables will feed into on two separate channels.
- A pair of main speakers, plus an additional monitor speaker if your DJ setup isn’t close to the main speakers
Now that you’re all set up let’s begin our step-by-step guide to help you learn how to DJ with vinyl:
Step 1: Compile Your Record Collection
Before you can learn how to DJ with vinyl records, you’ll need to build up a collection of tunes to work with.
If you’re new to DJing, there are many great resources where DJs get their music, and for vinyl, there are plenty of online and real-world stores.
Online stores such as Boomkat stock the latest releases from various electronic music genres, with more mainstream releases available from Amazon and elsewhere.
For second-hand vinyl, you can pick up a collection from websites such as Discogs or head to your local thrift store to see what they offer.
While digital DJing typically uses digital files downloaded from a DJ record pool, vinyl records are the only format you can use when practicing turntable DJing.
Once you’ve built up a vinyl collection of music you love, it’s time to fire up the decks and learn how to mix records.
Step 2: Pick Records Of Matching Genre
Whether learning to mix using DJ software or vinyl turntables, you should begin using music from the same genre.
Choose a genre you’re familiar with, whether hip-hop, house music, or EDM, then choose two tracks you know and love.
Music from the same genre tends to be around the same beats per minute and feature similar instruments and production styles.
For example, most house tunes are fixed at a tempo of around 120-130 beats per minute, meaning you’ll have enough leeway on the pitch controls to get them synced.
They will also use similar instruments and vocalizations, so if you’re moving beyond beat matching into phrase matching, they’ll sound pleasing when mixed.
This makes it easier to use for learning how to DJ with vinyl, as elements such as the kick drum and other breakdowns will be easier to identify.
Step 3: Cue Up The First Beat
Once your two music tracks have been selected, it’s time to cue the first beat at the very beginning of the second track on one record to match the tempo/BPM of the first.
Many tracks begin with a clear beat you can use, but if your chosen track has an instrumental introduction, skip past this until the beats and percussion are introduced.
To properly cue the track, set the DJ mixer so that the incoming track only plays through your headphones, so only the first track plays through the speakers.
While the first track plays, move the record back and forth over the kick drum at the beginning of the second, releasing the record when the first track starts a new bar.
You can identify a bar in the track by grouping and singling out four beats at the beginning of the record, with four bars comprising a complete phrase.
Melodies and chord progressions are structured in these phrases, so figure out where these are in your records and use them as intro points when dropping in the next track.
Step 4: Beat Match The Tracks
Once you’ve let the incoming track play through your headphones, you’ll need to make minor adjustments using the pitch shift to bring the tempo in line.
Beat matching is essential for a wide range of DJ transitions, ensuring both tracks are playing at the same BPM so you can move on to blending elements with the EQ.
As you listen to the second track playing through your headphones, increase or decrease the tempo with the pitch control until they match.
During the process, the beats may clash as you make adjustments, lightly touching the incoming vinyl record forwards or backward to keep the kick drums aligned.
Don’t worry if you make some mistakes while getting the hang of beat matching, as once you’ve had enough practice; the technique will become second nature.
Step 5: Blend The Second Track In
With the different tempos of both tracks now matched, you’re ready to start introducing the incoming track into the mix over the main speakers.
Release the incoming track on the first beat of a bar while a new bar begins on the other record, then slide up the volume on the mixer or move the crossfader to the center.
You can use the mixer to gradually bring the next track in so that the bass and other vocals and instruments don’t clash when they play together.
Professional DJs usually introduce the next track with the bass frequencies cut off, allowing them to smoothly switch these elements with the EQ.
Step 6: Use The EQ
Whether you’re playing with real turntables or other types of DJ equipment, the mixer’s EQ is where the art form really starts to open up.
Many techniques to improve your DJing skills begin with the mixer’s EQ, cutting out or reintroducing low, mid, and high frequencies.
The EQ can be used to switch between basslines from one track to the next quickly and gradually fade out elements to complete the transition between tracks.
It can also enhance breakdowns and transitions between two tracks and showcase your understanding of their best qualities.
Once the first track has been removed from the mix, you can still use the EQ to generate atmosphere and build-ups while the new track plays.
Step 7: Introduce Sound Effects
Another great way to bring some personality to your DJ sets and expand on the music you’re playing is to use sound effects.
There is a range of core DJ sound effects that many DJs use in their sets, which are available on most industry standard DJ mixers you can use.
Filters allow you to phase in and out low, mid, and high frequencies, taking the principle of cutting out frequencies via the EQ to another level.
Phasers and flangers can bring a more unusual dynamic to a record’s sound, while reverb and echo create a more spacious and resonant effect.
Practice using these effects at different points in the music to see how they affect the sound quality, and you’ll develop an instinct for the best times to use them.
Step 8: Pay Attention To Breakdowns
A common compositional element of many dance music tracks is the breakdown, the point where the beats and percussion take a back seat.
These breakdowns are ideal points in a track to use a range of DJing techniques and showcase your ability to excite the crowd.
Breakdowns give the crowd a brief respite from dancing and simultaneously build anticipation of when the beat will drop back in.
They often feature some of the track’s most interesting sound design, with synthesizers and effects rising in a crescendo and helping to excite the crowd.
To take your vinyl DJ set to the next level, pay attention to the breakdowns in your collection of records and use them to create dramatic moments in your mixes.
Step 9: Fade Out The First Track
The window of opportunity for experimenting with the EQ and other effects while both tracks play varies depending on the music you’re playing.
However long it is, eventually, you’ll have to commit to fading out the first track and letting the new track take over and dominate the speakers.
Once you’re ready to do this, you can fade it out by slowly bringing the volume control down on the relevant channel on the mixer until it no longer plays.
If you’re mixing between the two tracks using the crossfader, you’ll want to move this slowly away from the center towards the channel of the incoming track.
When you’ve done that, take the record off the turntable and select the next track, so you can start beatmatching it for the next mix.
Step 10: Learn How To Scratch
If you’re a hip-hop or drum and bass fan, learning how to scratch with your collection of records is well worth considering.
Buying records from an appropriate label is important if you want to learn how to scratch, and there are some dedicated scratch records on the market.
Scratching optimizes the potential you can get from two turntables, with a unique sound quality you won’t achieve when scratching with digital files.
There are many techniques you can use, from basic maneuvers such as the baby scratch to more complicated moves, including the flare scratch and crab.
Practice scratching with your favorite records or dedicated scratching vinyl to add another dimension to your mixing repertoire.
Summary
We hope you’ve found this guide to DJing with vinyl a valuable introduction to covering the basic skills you need to get started.
Once you’ve begun to master the basic elements, there’s plenty of scope to explore the full potential of your DJ mixer and turntables.
As your confidence builds, you can try mixing different music genres and using more complex EQ and effects techniques.
It’s a great way to showcase your versatility and take your sets to the next level with exciting and obscure tracks few other DJs will be playing.
Complement your vinyl records by signing up to ZIPDJ’s record pool and gaining access to a vast archive of music files.
Not a member ?
Join Today for Unlimited Music Downloads. Visit zipdj.com for more information.